Thursday, July 29, 2010

Life's a Stitch

Life's a Stitch
My Design Card for More Paper Than Shoes

Since the theme was stair step I did a side step stair step card for this month, Actually this is the second one for the month. I am filling in for the first Thursday until our Team leader can get someone. But This is my Thursday to day and here is my card. Sewing was my first passion then after I had Abby I got into scrap booking and card making. I have found that I love to make cards more that layouts now.
The stamps sets that I used to make this card where from Hero Arts and Crafty Secrets. I really like to mix and match my sets to come up with a project. The Paper that I used was from Websters Pages 6X6 Paper pad. Very vintage feel.

Wednesday, July 28, 2010

Christmas at the cafe

Last but not least
Christmas in July
This is the last card of the month for Design Team at Simply Scrapbooks. Who knows what will be next? Even I can't Wait to see

Here is the how to and supply list for the card as well as close ups.

Supplies used

My Favorite Things stamps Meet Me at the Cafe
Slice Mistletoe wreath cut at 2"
StazOn black
Copics YR00 powder pink, E00 skin white, Y21 Buttercup yellow, R27 Cadmium red, R29 Lipstick red, E37 Sepia, G24 Willow
White Liquid Applique
Heat gun
Stickles Xmas Red, Gold, Frosted Lace
Paper Memory Box Mistletoe 6x6 pad
card stock cream, white, green and red

Card is 4" x 5 1/2"
Add pattern paper to front leaving a light border
stamp image and cut out paper piece image
Cut mat 3 3/4" x 2 1/2"
adhere image to mat once the paper piecing is done and adhere to front of card about 1 1/2" to an 1 7/8" from top
Stamp Awning twice on different pattern papers add pop dots to bottom and adhesive to the top and adhere above the image
Stamp awning on green turn over and cut in half,
turn awning up side down and place the larger piece on top
adhere down under the image
Cut out wreath in green and cut it again in red for the bow adhere
Add stickles let dry add liquid applique heat with heat gun for snow
stamp and cut out cafe and the presents and adhere.

Meet Me at the Cafe

This is another Card that is for the Design team for Simply Scrapbooks
Meet me in the Cafe


Here is the Recipe for the card

Supplies used

Stamps My Favorite Things Meet me at the Cafe
Memory Box Branch
Slice Mistletoe card tag 2" (cut 3)
Tim Holtz distress applicator and ink-vintage photo
StazOn Black and Brown
Quickie Glue Pen
Zig Markers Spring Green, Chocolate
Copic Y21 Butter Cream Yellow, YG03 Yellow Green,
V17 Amethyst, R27 Cadmium Red, V04 Lilac
E37 Sepia, YR00 Power Pink, E00 Skin White
W3 Warm Gray, BG72 Ice Ocean, BG10 Cool Shadow
Paper Used
Memory Box Gossamer paper pad 6x6
Cream and Brown Card Stock
twine

Card Size 4"x5 1/2"
Distress the edges of card with vintage photo ink
stamp the branch in upper corner using the colored Zig markers set aside
on Cream card stock stamp image paper piece the clothes
Stamp and color with copics and cut out the present and cake
On pattern paper stamp Cafe and cut out
Stamp out the dog and color bow and distress the Dog with vintage photo
Color the sink drinks table and chairs with copics
Awning stamp out on two different pattern papers and layer
to get the bottom piece for the window stamp the awning on brown trim down and turn upside down
Cut down the paper pieced image and mat into Brown 3"x3 1/2" cutting off the bottom edges.
Inside I cut three 2' tags stamped saying and added twine

Girls Day in Set

OH BIG NEWS
I am now on the Design team for Simply Scrapbooks In Kettering Oh I am so excited this my first set for them.
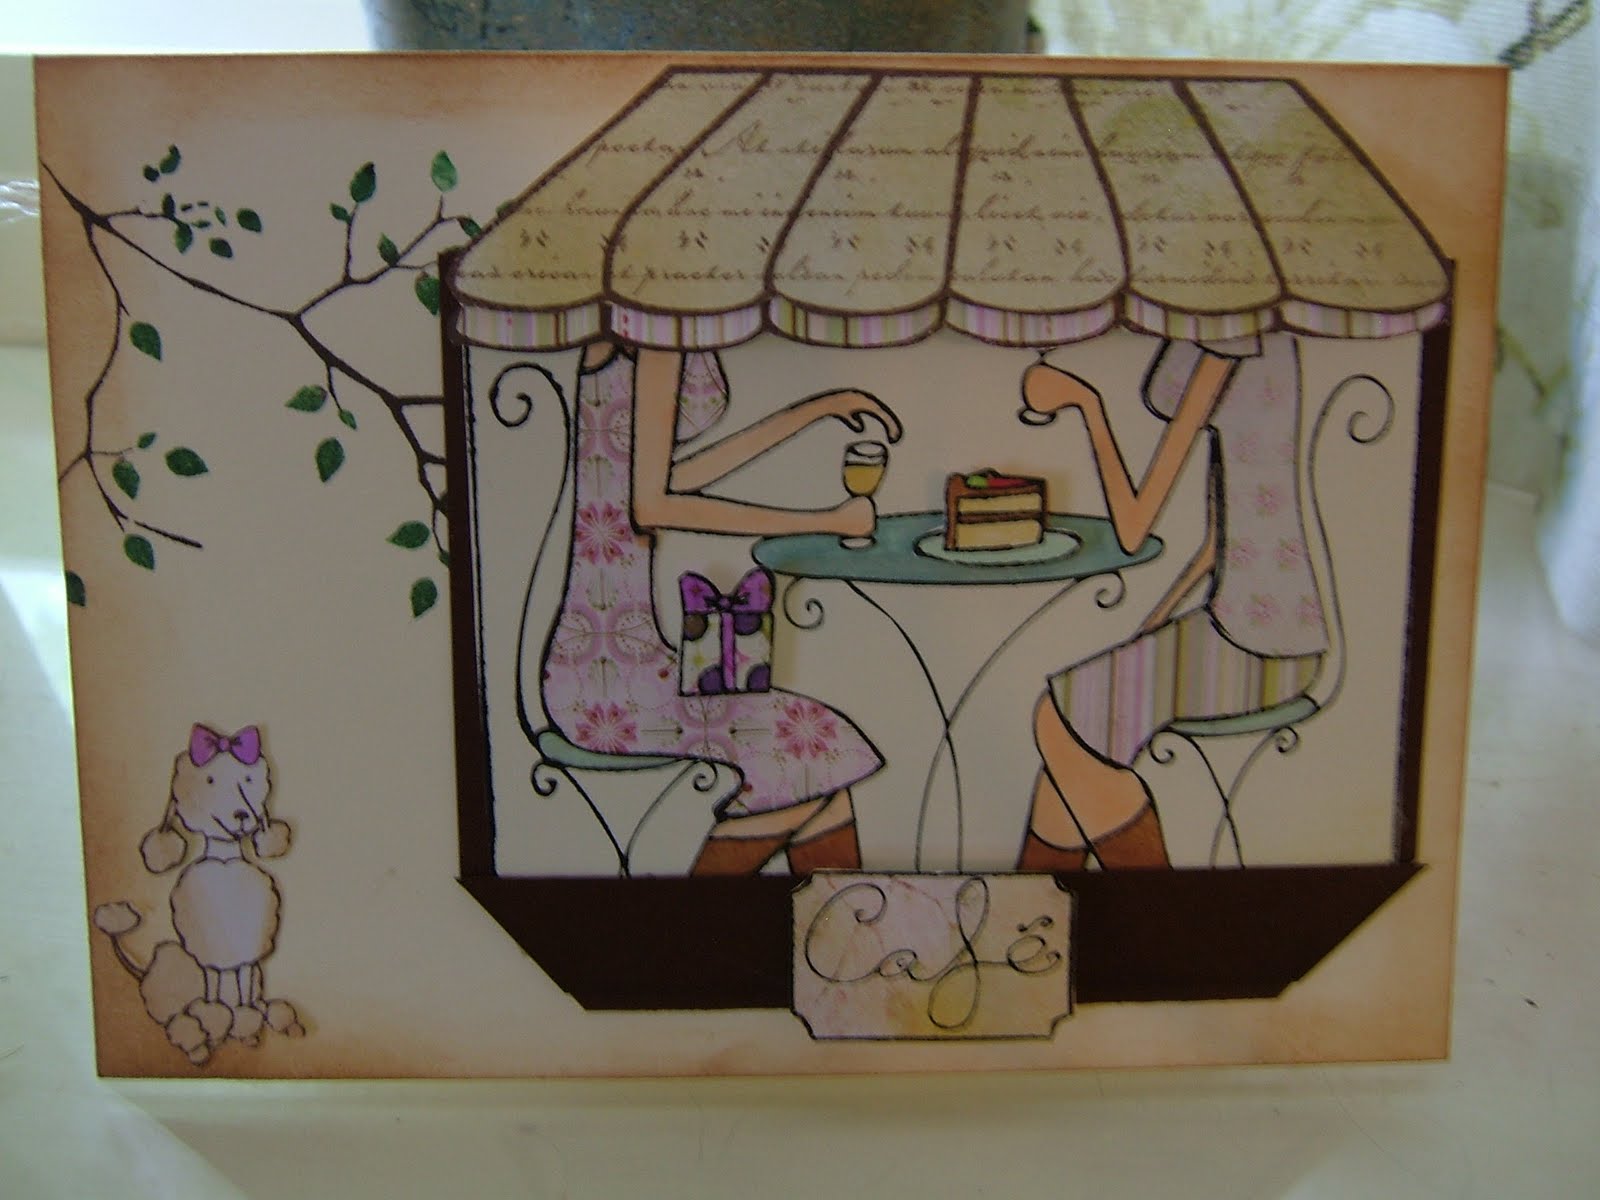
Girls Day in My Favorite Things Stamps
Supplies used

Slice Mistletoe card scalloped oval tag and the shadow both cut at 2"
Martha Stewart Score board
pop dots
lace or ribbon
Copic pink RV11
Quickie Glue Pen
Paper used
Graphic 45 Domestic Goddess (back side)                                                             
Basic Grey Kioshi -lt purple pattern, lt green, lt blue, lt teal, lt purple
October Afternoon Thrift shop black and cream polka dot
Fancy Pants Road Show tag
Peach Card stock
Light Tan card stock

Make card 4x5 1/2
stamp in lt blue Kioshi to paper piece on and leave a border from the edge
Cut tag out cutting around the flowers cut tag about 5 lines in and and glue it back down on the other piece (other wise the tag is to long to fit on card)
stamp and cut out pieces and glue on top of stamped image color the glass with copic pink
Pop Dot paper pieced image on top of tag. set aside
Cut Lt blue Kioshi 3 1/4" x 3 7/8" Place toward bottom of card leave a border.
Add the Paper pieced you set aside at the top leaving a slight border
Stamp out the bottles 3 times one on the Lt- teal, green and purple stamp the cork on to light tan cut both out and paper piece together
Place bottles on black polka dots and one place the polka dot on the shadow piece
Cut Purple 2 1/4" x 3 7/8" Score 1/4 along the 3 7/8" side
Stamp saying at bottom of purple
add a piece of ribbon or lace to purple above the saying
Cut a 1" strip of lt green and bunch a border add a 1/4" strip and stamp out saying adhere at top of purple then add the shadow polka dot bottle
add adhesive to the 1/4 scored and adhere to card leaving a border at the bottom
Add the other two bottles underneath stamp saying sideways
Add a lace or ribbon Knot at the top
On the inside stamp two saying on one side and add a 1" strip of left over paper

Makes a great card for a BFF's Birthday Wedding or Baby Shower.

Tutorial For Box
Here are the supplies you will need:


1 piece of 8.5 x 11 card stock
2 coordinating designer papers (uses less than 1/2 sheet)
Martha Stewart score board
Crop-o-Dile
2 jumbo eyelets
Magnets
Spellbinders label 4 (3rd from the largest)
ribbon or lace
Score tape
Black StazOn
My Favorite Stamps Girls Day In
Copic Colors used-YR04-Chrome Orange, YR68-Orange,RV11-Pink,E04-Lipstick Natural, R27-Cadmium Red, R29-Lipstick Red, W3-Warm Gray, W7-Warm Gray, E37-Sepia
Paper
Graphic 45 Domestic goddess Lady Of the house (the back side)
October Afternoon The thrift Shop (8x8) black and cream polka dots and Yellow Damask
For the Velum Tag I used glossy accents applied first then added Martha Stewart micro beads clear.

Cut the card stock for your box to 8" by 11"
Score the 11" side at 3", 5", 8" and 10"
Score 8" side at 1 1/2" and 6 1/2"
Cut out corners on score lines 1" and 3" on both sides
At score lines 6" and 8" cut up to score line both sides (do not cut out)

Cut 2 pieces of designer paper to 4 7/8" by 2 7/8", these will go on the front and back. If your DP has a definite top and bottom be mindful that you don't adhere the paper upside down
Using my Cuttlebug and spellbinders Labels 4 (the 3rd from the largest) cut out of the front panel, keeping towards the bottom edge so when the flap is closed your oval is still centered properly. You can always cut the front flap down a little if need be.(I cut my flap down a 1/4")
Adhere a piece of acetate to the inside of the front flap for your window
On the same end on the flaps place your score tape I added 2 strips
assemble your box.
Use a coordinating piece of designer paper to cover the top, flap and sides:
top piece: 1 7/8" by 4 7/8"
2 side pieces: 2 7/8" by 1 7/8"
front flap: 4 7/8" by 7/8" (remember to make it a little smaller the 7/8" if you cut it down)
Place the + side of the magnets on the inside of the box (add a glue dot or score tape to the back of the + side and adhere. place the - side of the magnet the front of the box with the - facing toward you (you might want to add a glue dot to this to it so it is stronger) then line of the lid and press.
For the ribbon handle, set the largest hole punch on your Crop-a-Dile to 1/2" depth.
Punch a hole in both sides, set with a jumbo eyelet

Sunday, July 25, 2010

Abby had a birthday party to goto for one of her little friends. So I made her a card using banners, Yes I am on the band wagon with Banners I just love them. SO I finally got to play with my parties card from Slice to make this card. I also used vintage findings for the bird and the clouds are dies from My Favorite Things Stamps.

Thank Goodness for Little Curls

I made this Side Step Stair Step card with Abby In mind she is growing up so fast. I fell her child hood slipping away  from me. My Little girl is going to start 1st grade. This will be the first time that she well be at school all day all week. Man I have a lot to keep me busy but I will no longer get to have lunch time with my baby and get her all to myself before Daddy gets home from work. Yes I am feeling very selfish right and I have that right. lol This card was Also for my design team More Paper than shoes. I Used free click art from flickr and October afternoon paper. Here are the measurements for the card.

The card base is 5.5 x 12"
Score the card at 4", 6.5", 9", and 10.5"
Measure in 2.5" (this was my measurment0
cut the card from 10.5" to 6.5"
http://www.youtube.com/watch?v=gAg9sJM5DrY&videos=ACIcIuoNaXg
You can check out the video and it will show you how to cut and where to fold the side panel. Hope you enjoy.

Saturday, July 24, 2010

Been Down and out

I have been down and out, or at least out of it. I have had an inner ear infection, and I can tell you that it has not been fun what so ever. Having vertigo and feeling sick is not what I ever want to experience again. This has been a horrid week and Abby has been a trouper, She has helped me this week being a big girl and understanding that Mommy has not been feeling well. I am just glad that I have been getting a little ahead with getting my cards done. I go to my first meeting tomorrow for Simply Scrapbooks  design team. I am excited to get that started. So I have a lot of work ahead of me. It keeps my artistic talents flowing and I love that. Abby only has 3 days of summer school left next week so I have a lot to get done in those 3 days. I will be up loading some more pictures hopefully tomorrow once I get home from work and Simply Scrapbooks.

Wednesday, July 14, 2010

If you have to go camping you might as well look good doing it......

"A camping we will go a camping we will go, hi ho the dairyo of a camping we will go"
Well that's enough singing for now.
Now on to the camping card I have a little story to tell no I am sorry it is not a scary camp fire story either. I was (on a riding mower) mowing the lawn on Monday and of course my mind goes a hundred miles an hour when a light bulb went off in my head (mind you this happens a lot when I am in the shower and right before I go to sleep I don't know why but it does). Anyway I had to stop the and go run it to the house to get a  little note book and pencil to right down my idea of course or I will forget if I don't. First the saying came to me "If you have to go camping you might as well look good doing it" I had to keep repeating it to myself until I got it down. So I decided to take said note book and pencil out on the mower with me so I could finish jotting down ideas when I got them. (Yes I did look a little funny stopping every so often to write something down. Thank God My Hubby is used to this strange occurrence but people driving by did slow down a little.)
So for the card and it's design I had made this card base with the triangle cut out of the center and the scallops on the edge. I had that part done for a while and just set it to the way side. That was until I got the idea for the camping card then I added the pink paper and the berry paper to it. I made so it looked like the tent was opening. The women was from Hero Arts stamps and the table was cut from my slice. I had some camping stickers mercy from years and years ago that had the Coffee pot and cups. SO I add them to the table along with a table cloth. Now for the Inside of the card.
For the inside I used my Slice again to cut the grass (I really need to get that Martha steward grass punch) I don't really like it but it worked. I also Used the slice to cut the man rowing the boat as well as the sign. The pond I just cut by hand from some water paper. My tree and fire where from the same stickers as the coffee pot and cups. Thanks for taking the time to read my long story I hope you got a laugh out of it I know I did just writing It.
Oh Yeah this will be up loaded to More Paper than shoes tomorrow Morning!

Saturday, July 10, 2010

My Jewelry- Locus Wings

OK So here it is My Jewelry!
My Dear Dad has been asking when I am going to get these on my blog. The problem I was having was trying to get pictures of them it wasn't easy I can tell you that. The lighting was all wrong most of the time. But with true diligence my Mom and I got some good pictures.

The earrings are done on scrabble tiles and
the necklace pendant is a rummy cube tile.
The Art Work is Locus Wings I copied prints of my sisters art work.
You can check out more of her stuff at

Here Comes The Sun

Here comes the Sun is my card for MPTS(more paper than shoes)I am a little early for it is not do until Sept., so some of you are going to get a sneak peek of my card.
I have a lot of little details going on in this card. I used scraps of paper to paper piece the bird, flowers and leaves.  I wanted the to add some extra pieces to the branches so by stamping it out and cutting it apart I was able to get the look that I was after. The bird and branch stamp is from from Memory Box. The bike is a stamp as well from Hero Arts stamps. The rocks I stamped out on a piece of paper colored and cut them out to lay randomly on the ground. The rocks are a stamp from IO (impression obsession). The Sun was cut from my slice I also cut the green grass part from hand and the words "Here Comes the Sun" Where typed and printed out on velum.

Thursday, July 8, 2010

Here it is the first card for my design team challenge at More Paper than Shoes.  You can check it out here http://morepaperthanshoes.proboards.com/index.cgi?action=display&board=cmct&thread=292&page=1
I used October Afternoon Paper for the back ground and the waves. The Sun and the Boat was cut using my wonderful Slice. The Dolphin was a stamp from  imaginisce. The Clouds where cut using a die cut from MFTS (my favorite things stamps) I cut the clouds out of felt from Hobby Lobby.
Let me know what you think. Thanks for stoping by.

Tuesday, July 6, 2010

Enevlope Note Card Box

I was looking for a new style of a note card box to make and I came across a blog (sorry I don't remember which blog it was) that was selling a block of wood to be able to make a thick (or 1/4" depth) envelope. Well if anyone knows me they should know that if I like it well enough I am going to try to figure out how to make it. Well that is just what I did. I was wanting to make a Note card box with thick envelopes and after a little work I made it. So here it is for everyone to see. I used Amy Bulter paper and my slice, as well as some Hero Art stamps and I think even Autumn Leaves stamps. Let me know what you think.
                                                     This is the the front of my Box
Inside of the box with the two thick Envelopes
Side view closed

Note cards for the box 10 total
Abby was impressed with the women in the rodeo.

Fram Days in west Alex

                                            Abby loves horses but then what little girl doesn't.

Abbys Butterfly

                         Farm Days in West Alex. Memaw and Pawpaw took Abby for a day full of fun.

Monday, July 5, 2010

I pray everyone had a wonderful and save 4th of July. IT was busy here my Mom and Dad had Abby over the weekend and they took her to West Alex for Farm Days. I guess Abby had a ball, she got to see cow girls and a redo. She also got to pet a Joey that was 4months old and feed pygmy goats. Abby also got her face painted a butterfly and pink of course. The went back that night to see fire works. I should have gone with her, but Rick and I stayed in town and got to watch Huber Heights Fire Works. It was fun but I got no less than a 8 bug bits on my legs. I will have some pictures to put up a little later

 I am Proud to say that I got asked to join the design card team over at More Paper than Shoes. This is a fun way for me to enjoy my summer while Abby heads off to summer school (so she can get a boost for 1st grade) So I will have some free time to work on projects. So stop by the forum and check us out.  This is a  great group and bunch of great designers. Look for me under jesssews.
http://www.morepaperthanshoes.blogspot.com/

Friday, July 2, 2010

 
A Very Happy Wonderland Birthday
Make a wish you are Queen for the day!
I Love to mix Crafty secrets Stamps when making cards. I also used Tim Holtz die cut to shape the side of the card. This was a lot of distressing fun to make.
We all Live in a Yellow Submarine in an Octopus's Garden
Ok so we don't all live in a yellow sub but hey the idea for the card screamed out to me for my Brother-in -Law's Birthday. Since he is a HUGH Beatles fan.
I used my wonderful Slice to help me make this card and what fun it was to make to.Here is a close up and you can see the Beatles in the windows of the sub and here is the inside of the card. I used my slice to die cut the words and the 55th..........

                                                                OOOOOh LaLa
Yea I did another one or I should say that my Mom and I both did one. This is the front of my Moms and the back of Mine. We used dcwv La Creme paper and some black lace with a little pearl in the front. Wicked cute if I do say so myself.
dcwv (die cuts with a view)

Thursday, July 1, 2010

RED WHITE and BLUE!!!!

Ok It is time to show our pride for the Red White and Blue! Well at least it is American Made lol. I did make this card for a 4th of July birthday. For the inside I came up with a witty little saying. "Don't be a boob just blow out the candles and
don't be and even bigger butt make the wish first." Oh course Rick came up with some other Ideas for this card design while we were having dinner so you just might see some more of these cards in the future. Only time will tell......


Are these the sweetest owl you have ever seen? Well Thanks to My Dad who was very sweet and drew this owl for me so I could make these sweet little things. I resized it to make a box and card. I am going to try and make it again and make it a little smaller. I winged the box part and it took two trys but I got it. I used my slice to cut the eyes and nose for the owls. The Paper I used was was K&Co Amy Butler and Pebbles-sunshine.